Synkbay Help
Synkbay is an Android file manager for your Mac. It connects to your phone over a USB cable, so you can browse its files, copy them both ways, preview them, and keep folders in sync, with no app on the phone and no cloud account.
Features marked PRO need Synkbay Pro. Without it, you can try each one 3 times.
Getting started
What you need
- A Mac with Apple silicon (M1 or later), running macOS Sonoma 14.4 or later.
- An Android phone that offers File transfer when you plug it in (almost all do).
- A USB cable that carries data, not just power.
Installing
- Open the Synkbay disk image you downloaded.
- Drag Synkbay onto the Applications folder shown next to it.
- Open Synkbay from Applications or Launchpad.
- The first time, Synkbay asks you to agree to its license agreement. Click Read Agreement to read it, then Agree to start, or Quit. It asks again only if the terms change.
- Synkbay then asks whether to open when you log in, so it can wait in the menu bar and open by itself when you connect a phone. Click Open at Login, or Not Now: you can turn it on later in Settings → General.
If macOS says it can't check Synkbay for malicious software, open System Settings → Privacy & Security, scroll down, and click Open Anyway next to Synkbay. You only need to do this once.
Connecting a phone
When no phone is connected, Synkbay shows what to do:
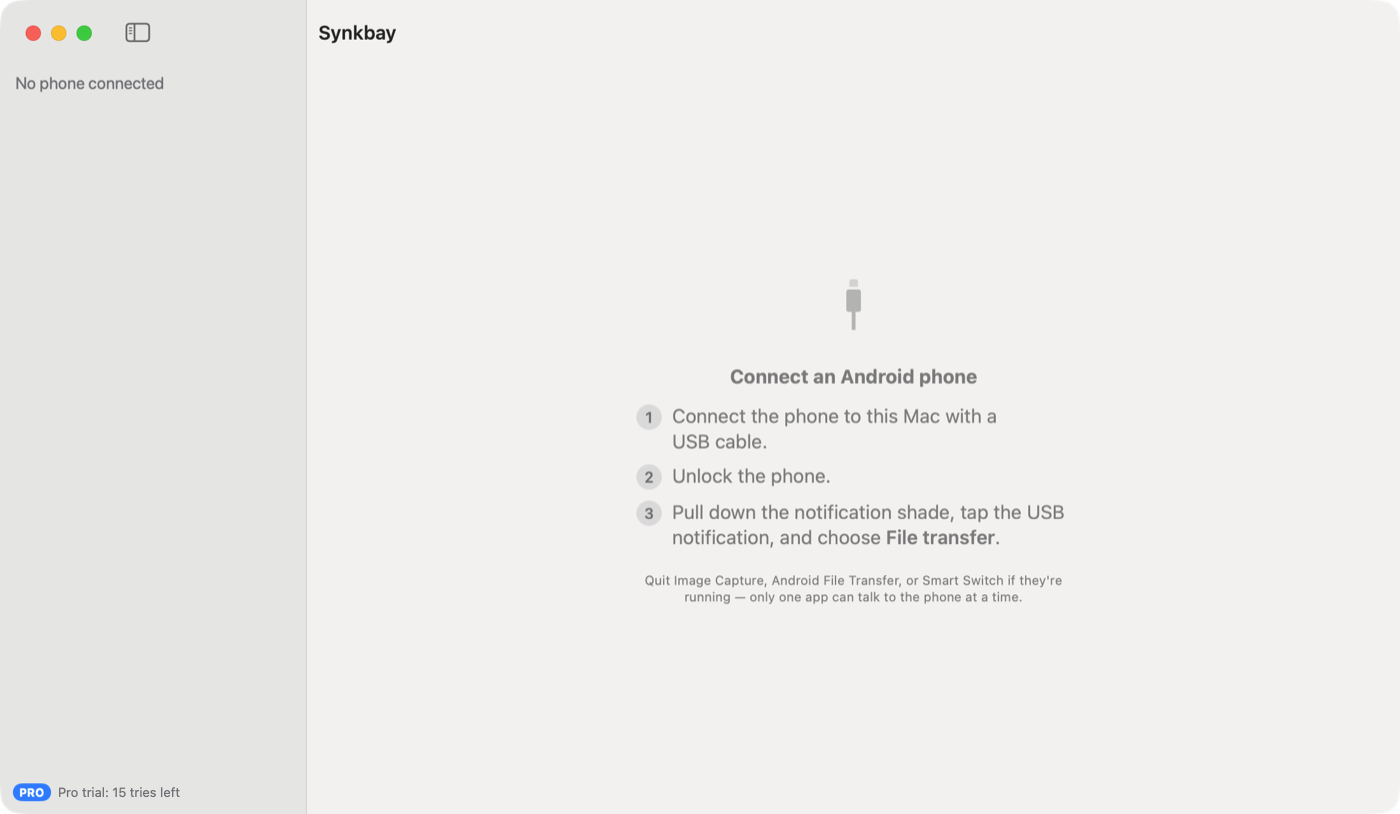
- Plug in the phone with a data USB cable. Synkbay finds it by itself.
- Unlock the phone. Android hides its files while it is locked; Synkbay waits and connects as soon as you unlock it.
- Choose File transfer. Pull down the notification shade, tap the USB notification, and choose File transfer (sometimes called Transferring files). If the phone asks whether to allow access to phone data, tap Allow.
Only one app at a time can use the phone. If Image Capture, Android File Transfer, OpenMTP or Smart Switch is holding it, Synkbay names that app and offers to quit it. See Troubleshooting.
Synkbay in the menu bar
While Synkbay is running, its S is in the menu bar:
- Black or white, matching the menu bar: no phone connected.
- With an orange dot: a phone is connected but not ready yet. Unlock it and choose File transfer.
- In colour: a phone is ready.
Click it to see each phone's state, open Synkbay, or quit. When a phone becomes ready, Synkbay opens by itself, once each time you connect it; turn this off with Open When a Phone Is Ready in that menu or in Settings → General.
Closing the window leaves Synkbay in the menu bar, and out of the Dock. While no Synkbay window is open, it lets go of the phone so other apps can use it, unless a transfer or sync is still running. To quit, choose Quit Synkbay (⌘Q).
The Synkbay window
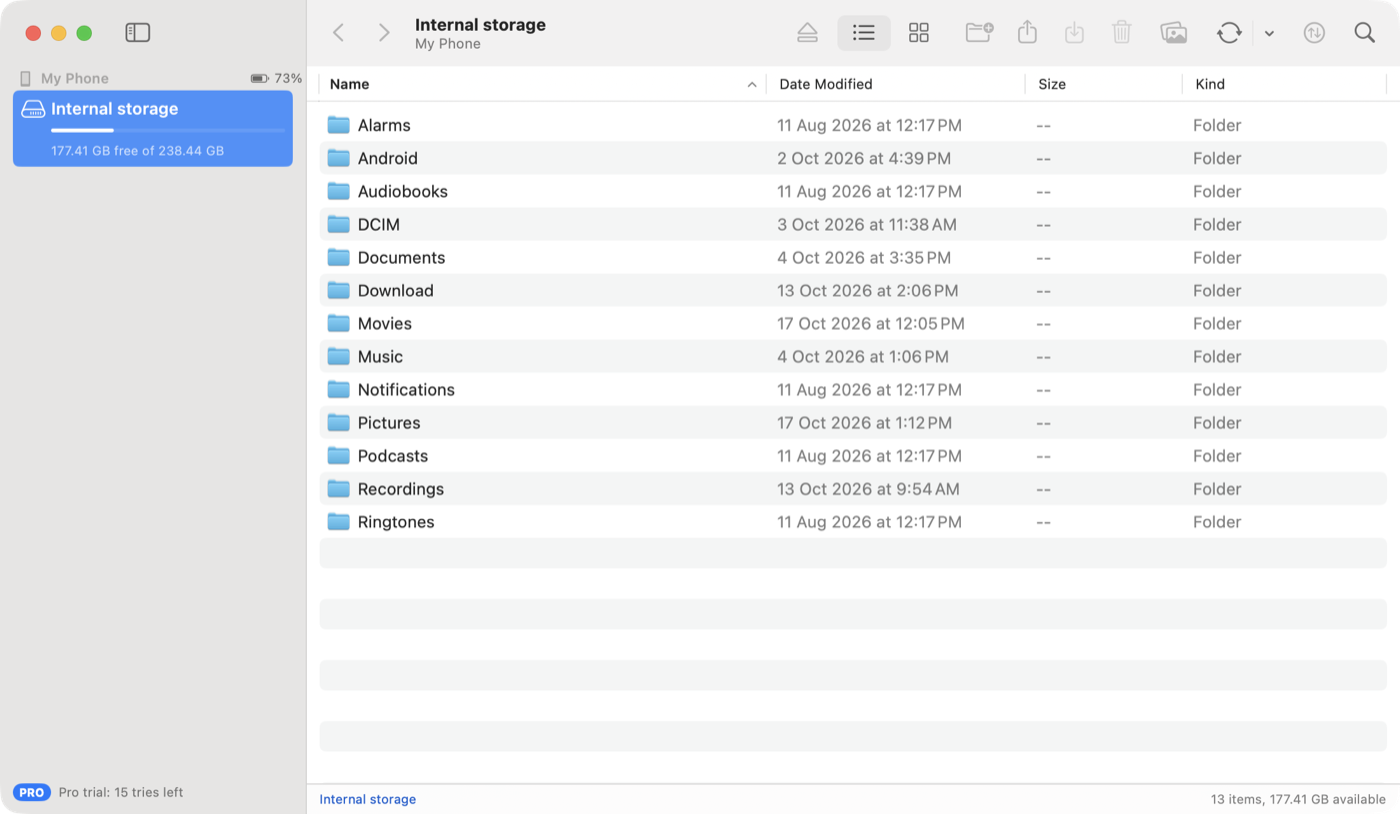
- Sidebar (left): each connected phone with its battery level, and its storages (internal storage and any SD card) with the free space. Click a storage to browse it.
- Toolbar (top), from left to right: Back and Forward, the folder's name with the phone under it, then Eject, the List / Icons view switch, New Folder, Upload, Download, Delete, Sync Photos, the Sync Folders menu, Transfers and Search. When the window is narrow, buttons that don't fit are in the » menu at the end of the toolbar.
- File list (middle): the folder's contents.
- Status bar (bottom): where you are, how many items there are, how many are selected, and the free space.
- Transfers panel (right, when shown): copies in progress and the transfer history. See Transfers and history.
Browsing the phone
Double-click a folder to open it. Use Back and Forward in the toolbar, or ⌘[ and ⌘], and ⌘↑ for the enclosing folder. Go → Refresh (⌘R) reads the folder again, for example after taking new photos.
List and icon view
Switch with the List / Icons control in the toolbar. In list view, click a column heading to sort by name, date modified or size. Icon view shows photo and video thumbnails from the phone.
As in Finder, documents with content (PDF, text, Office files and similar, up to 8 MB) show a preview of their first page in icon view, and empty files show the plain document icon.
Folders and files use the same icons as Finder. If you change the folder colour on your Mac, the phone's folders in Synkbay change with it.
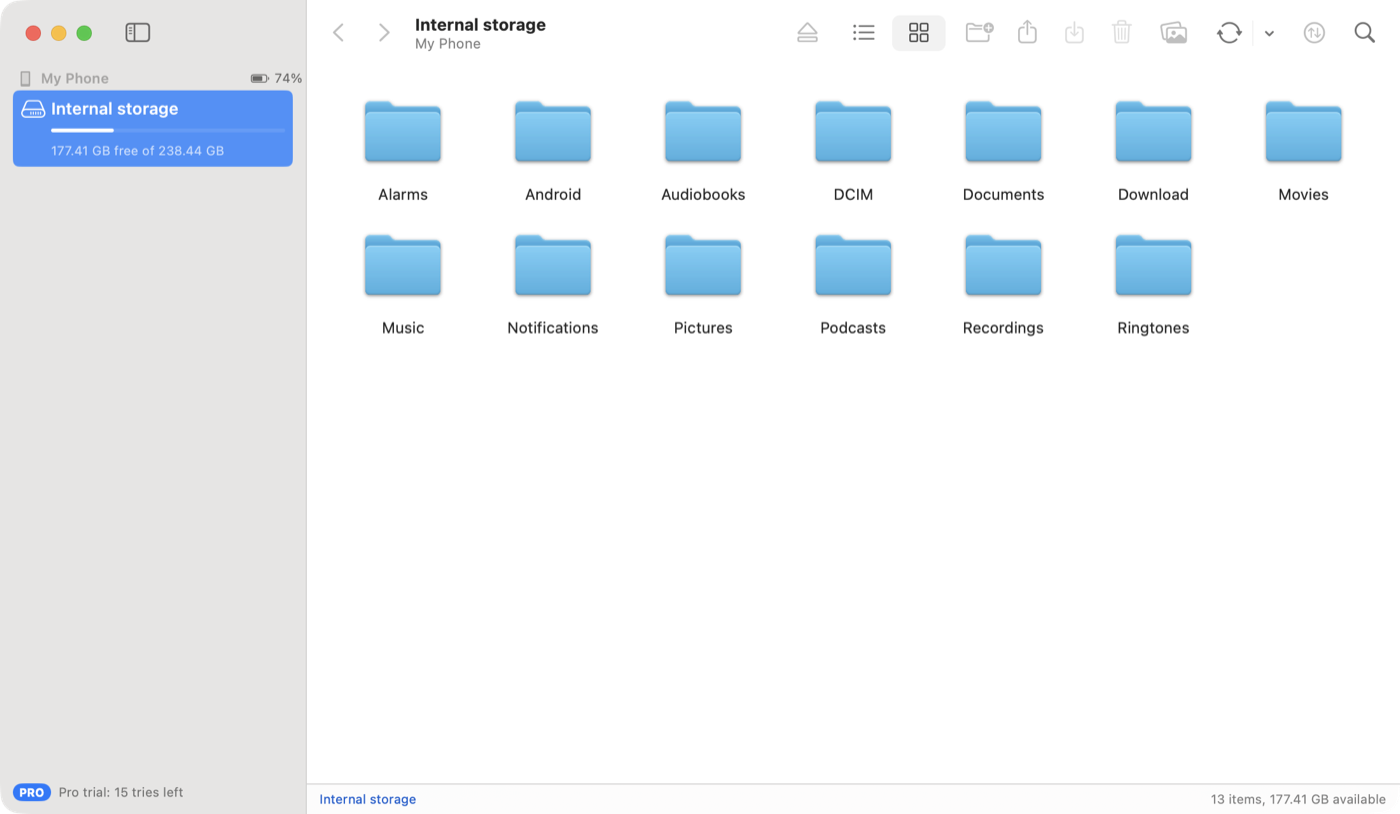
Files whose names start with a dot are hidden. To see them, turn on Show hidden files in Settings → Browsing.
Searching
Type in the Search field in the toolbar. Choose This Folder to filter the folder you're in as you type, or Include Subfolders and press Return to search every folder inside it. Search results show where each file is.
Quick Look
Select one or more files and press Space to preview them, as in Finder. You can also choose File → Quick Look (⌘Y) or right-click a file and choose Quick Look.
- The phone's thumbnail appears at once, and the full file replaces it when it has been copied to the Mac.
- With the preview open, ↑ and ↓ move through the list, and ← and → move between the selected files. Press Space again to close it.
- Files over 200 MB, such as long videos, aren't copied for a preview; you'll see the thumbnail and the size. Download them to watch them.
- Previews don't appear in the Transfers panel, and their copies are deleted when the preview closes.
Copying files
Whole folders copy with everything in them, in both directions. Files over 4 GB are fine. If a file with the same name is already there, the copy gets a new name, such as photo (1).jpg, instead of replacing it.
From the phone to the Mac
- Drag files or folders from Synkbay to the Finder, the desktop, or any app that accepts files. The copy starts when you drop, and lands right there.
- Download: select files and click Download in the toolbar, or right-click and choose Download. They go to your download folder (Settings → Downloads).
- Download To…: right-click and choose Download To… to pick a folder each time.
- Open: double-click a file to copy it and open it in its app on the Mac.
Downloaded files keep the dates they have on the phone. A file only gets its real name once it has arrived completely.
From the Mac to the phone
- Drag files or folders from the Finder onto the Synkbay window. They go into the folder you're looking at, even an empty one.
- Upload: click Upload in the toolbar or choose File → Upload Files… (⌘U).
- Paste: copy files in the Finder (⌘C), then press ⌘V in Synkbay, or right-click empty space and choose Paste Item.
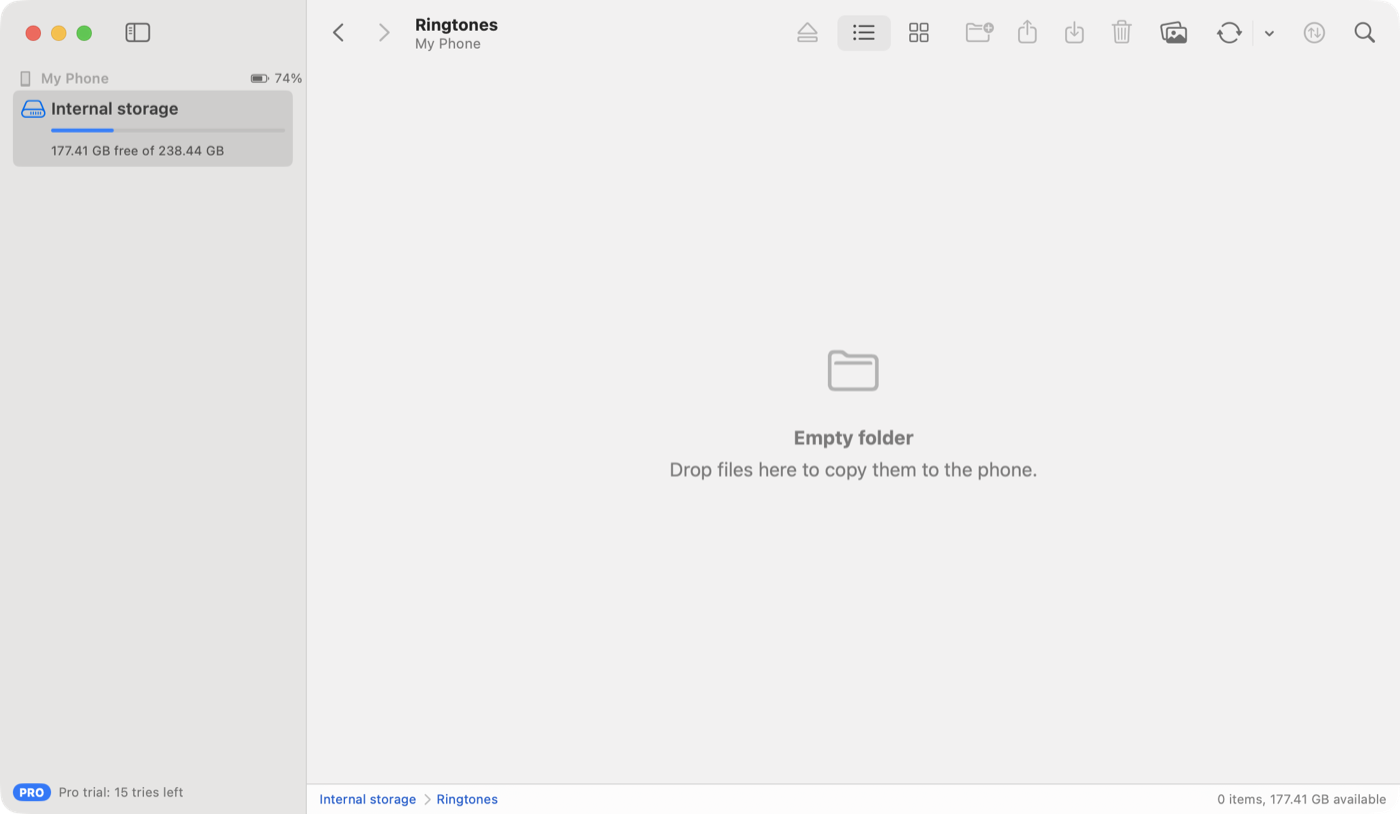
New folder, rename and delete
Right-click a file or folder for Open, Quick Look, Download, Download To…, Rename…, Sync This Folder… (folders) and Delete Immediately…. Right-click empty space for New Folder…, Upload Files…, Paste Item, Sync Photos…, Sync This Folder… and Refresh.
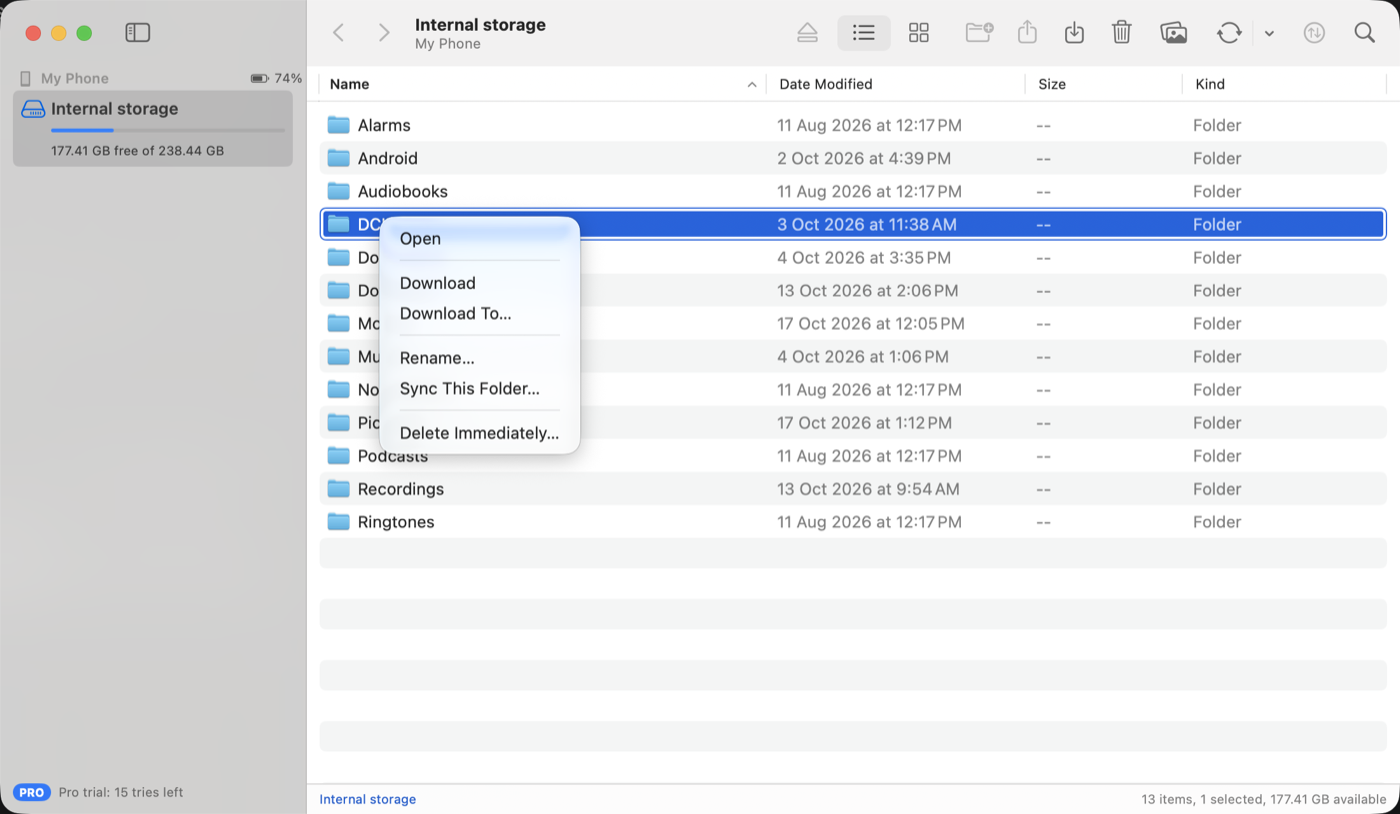
Deleting removes files from the phone straight away; there's no Trash on the phone. Synkbay always asks first.
Transfers and history
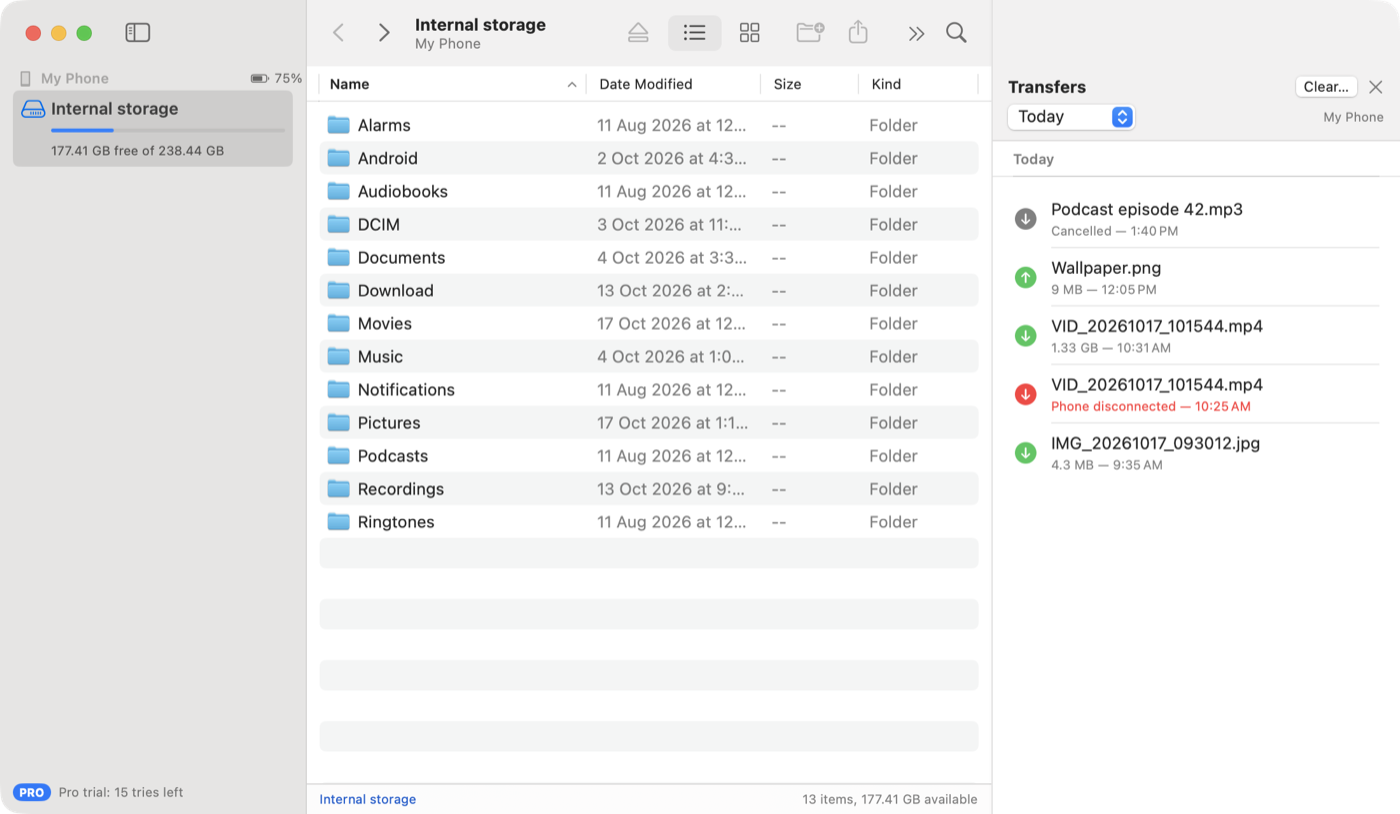
Click Transfers in the toolbar, choose View → Show Transfers (⌥⌘T), or click the progress summary in the sidebar. The toolbar button shows how many transfers are running.
- Each transfer shows its progress, speed and time left. You can cancel it, retry it if it failed, or show the copied file in the Finder.
- Cancelling is safe: a cancelled download leaves no partial file on the Mac, and a cancelled upload's partial file is removed from the phone.
- Each phone keeps its own history, kept between launches. Choose what to show in the menu at the top of the panel: Today, This Week, This Month or All. Older transfers show their date as well as the time.
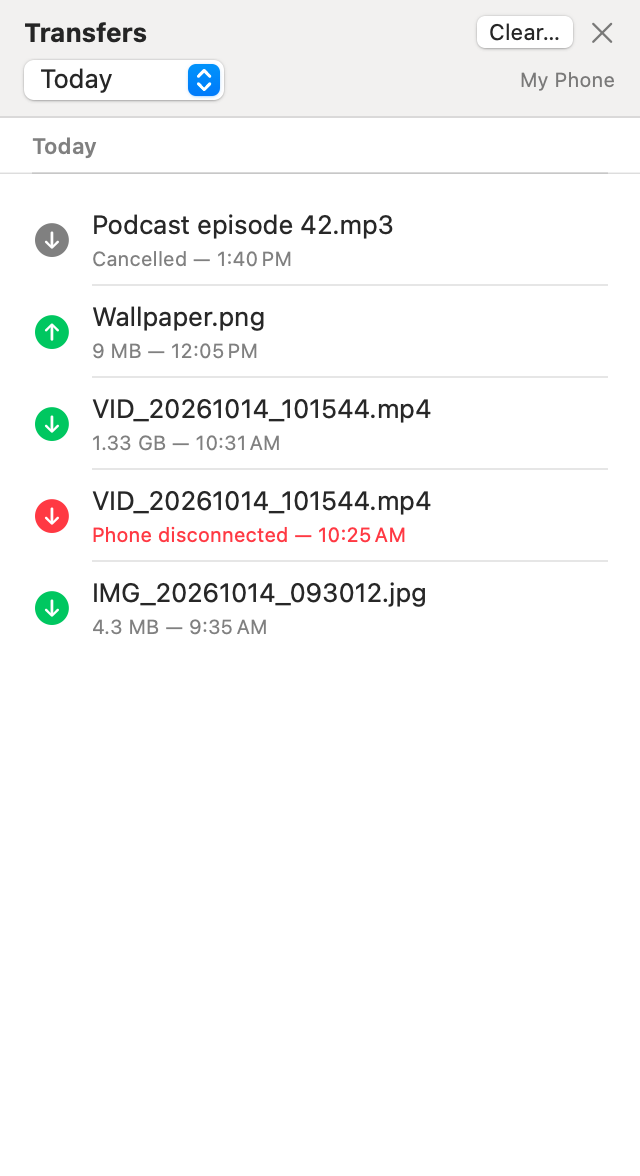
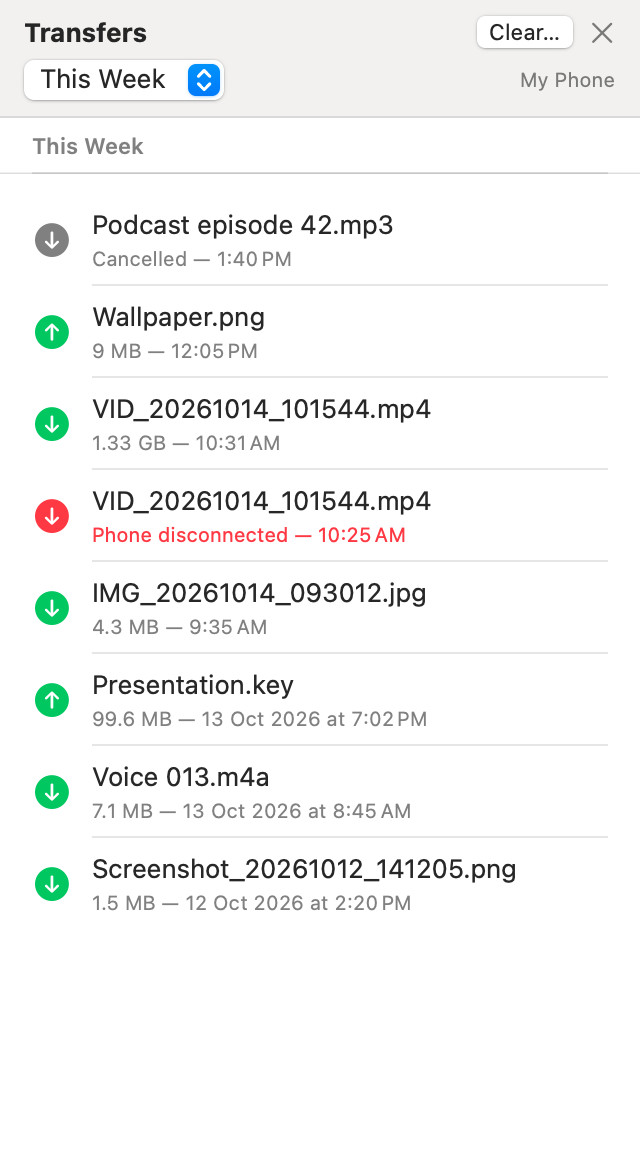
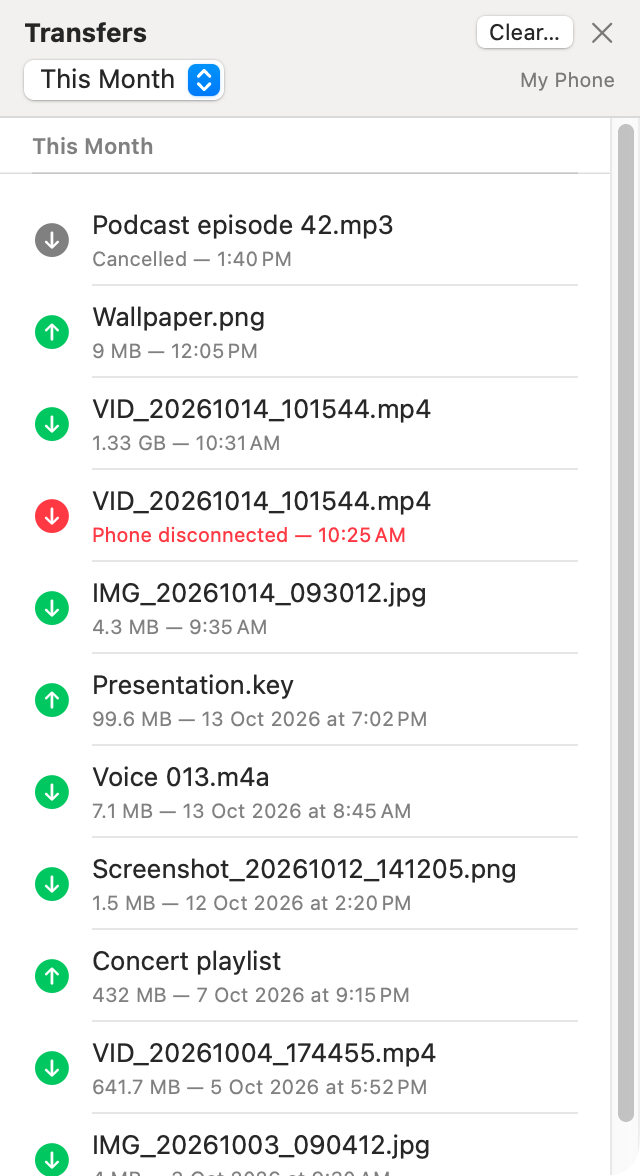
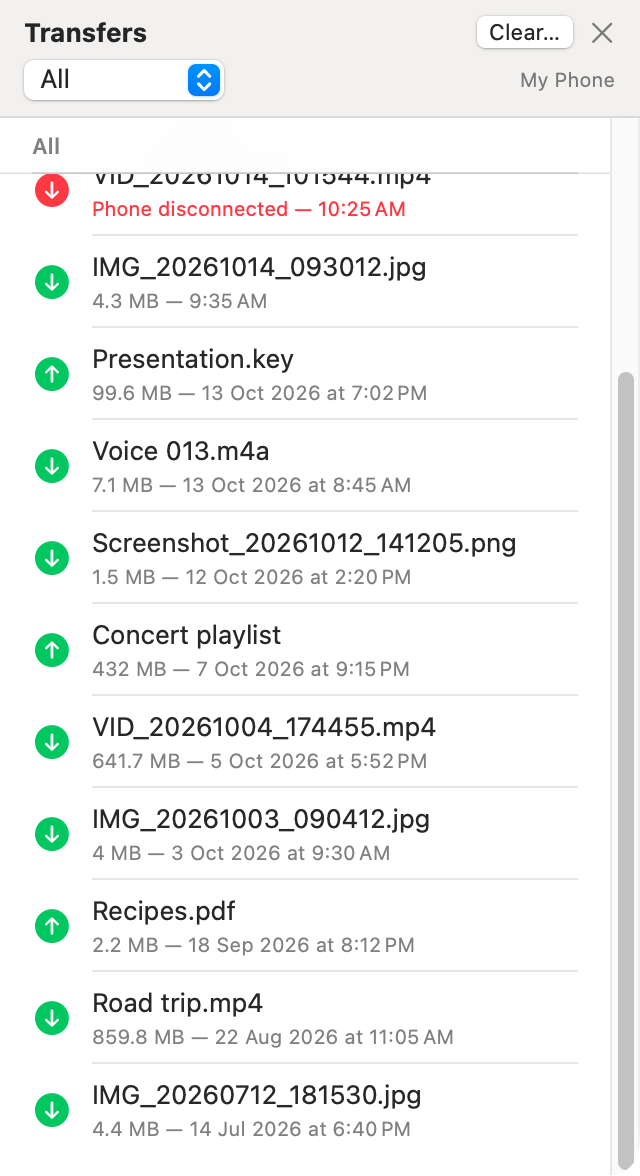
- Clear… removes the finished transfers of the period shown (for example Today) from the list. The files themselves aren't touched. To clear every phone's history, use Clear History… in Settings → Transfers.
Ejecting and reconnecting
Before unplugging, click Eject in the toolbar, choose File → Eject (⌘E), or right-click the phone in the sidebar. Synkbay closes its connection and releases the phone, so it's safe to unplug and other apps can use it. If anything is still copying, Synkbay asks first.
An ejected phone stays in the sidebar with a Connect button until you unplug it.
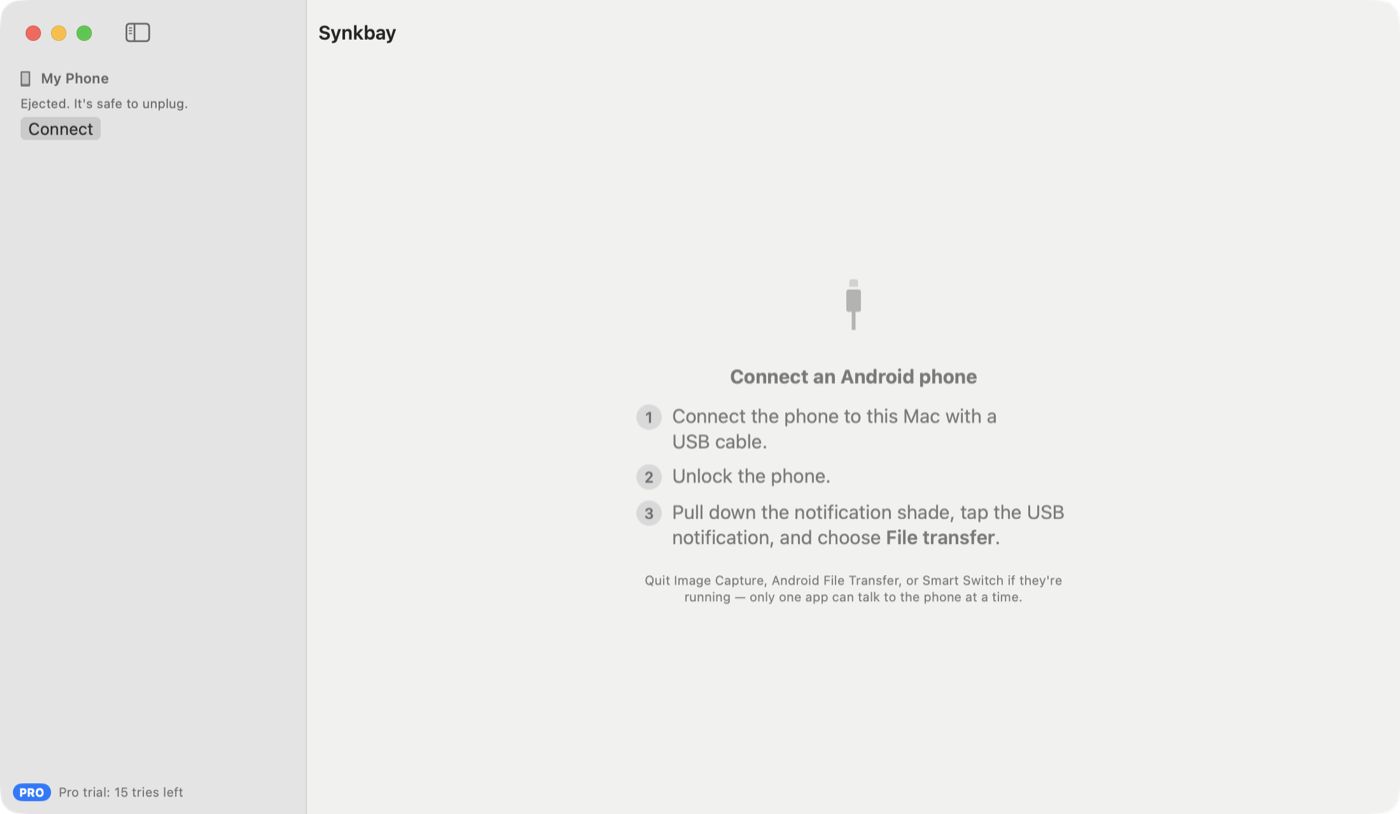
If the cable comes out by accident, the running transfers stop and show Phone disconnected. With PRO and Resume interrupted transfers on (Settings → Transfers), they continue when you plug the phone back in and unlock it. Synkbay recognises the phone and finds each file again by its location.
Photo Sync PRO
Photo Sync copies the photos and videos that are new since last time from the phone to a folder on your Mac, skipping ones it already copied.
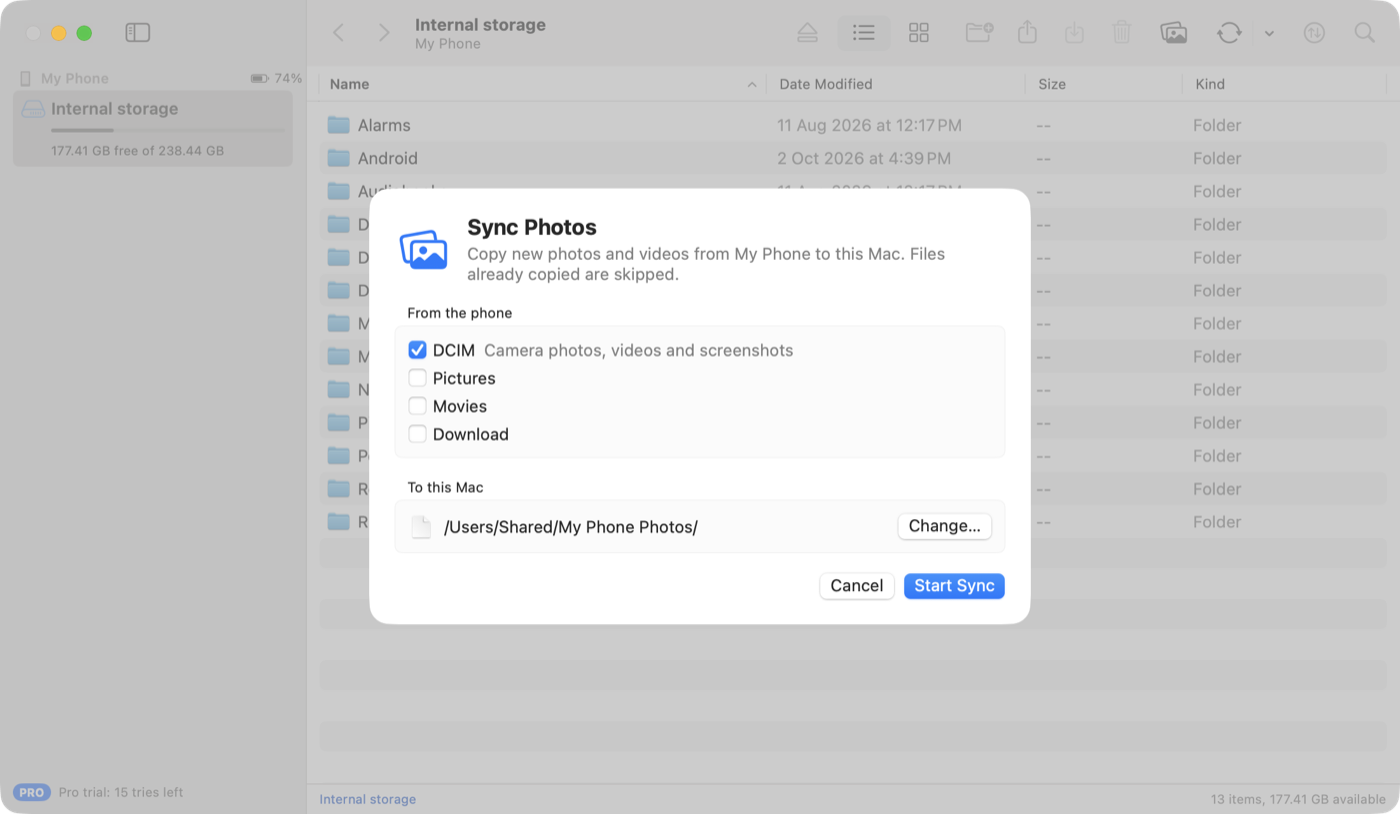
- Click Sync Photos in the toolbar, or right-click empty space and choose Sync Photos….
- Under From the phone, tick the folders to copy. DCIM holds camera photos, videos and screenshots.
- Under To this Mac, keep the suggested folder in Pictures or click Change….
- Click Start Sync. The copies appear in the Transfers panel.
Sync folders PRO
Sync folders keep a folder on the phone and a folder on the Mac copied, in one direction: Phone → Mac or Mac → Phone.
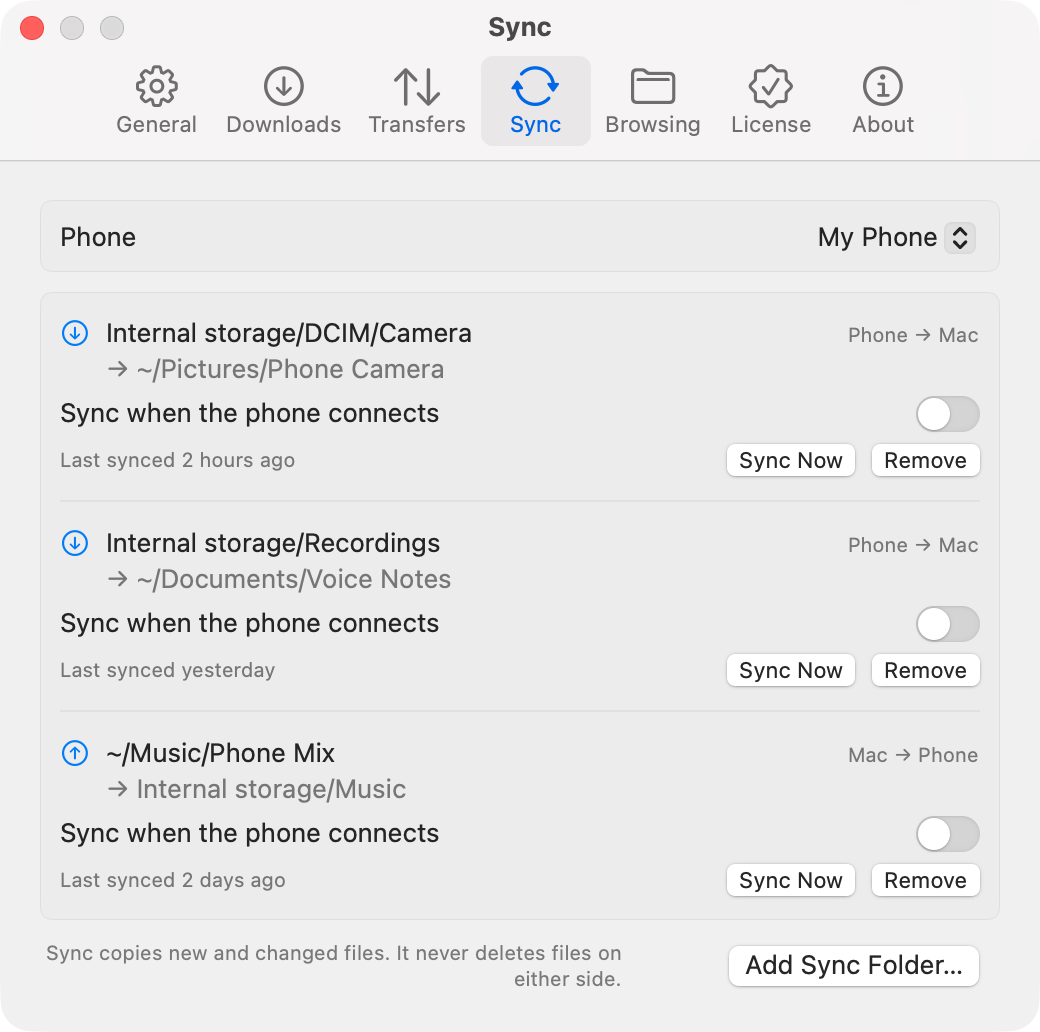
- Open Synkbay → Settings → Sync with the phone connected, or right-click a folder in the browser and choose Sync This Folder….
- Click Add Sync Folder…, choose the direction, the phone folder and the Mac folder, then click Add and Sync.
- Turn on Sync when the phone connects to sync automatically, or click Sync Now.
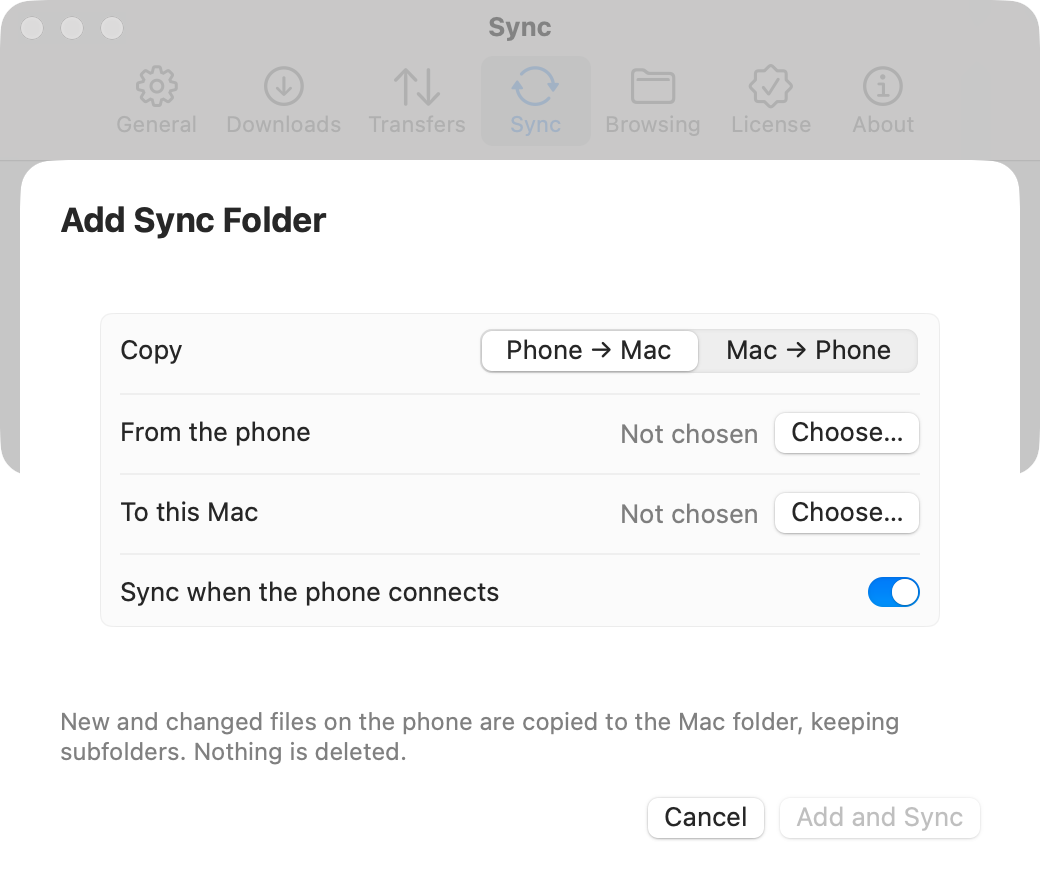
The Sync Folders menu in the toolbar runs one folder or all of a phone's folders at once.
Sync never deletes anything, on either side. It copies new files and files that changed since the last sync. If the destination has a different file with the same name that Synkbay didn't put there, it's left alone and reported. A changed file on the phone is replaced only once the new copy is complete.
Phones: nicknames, info and several phones
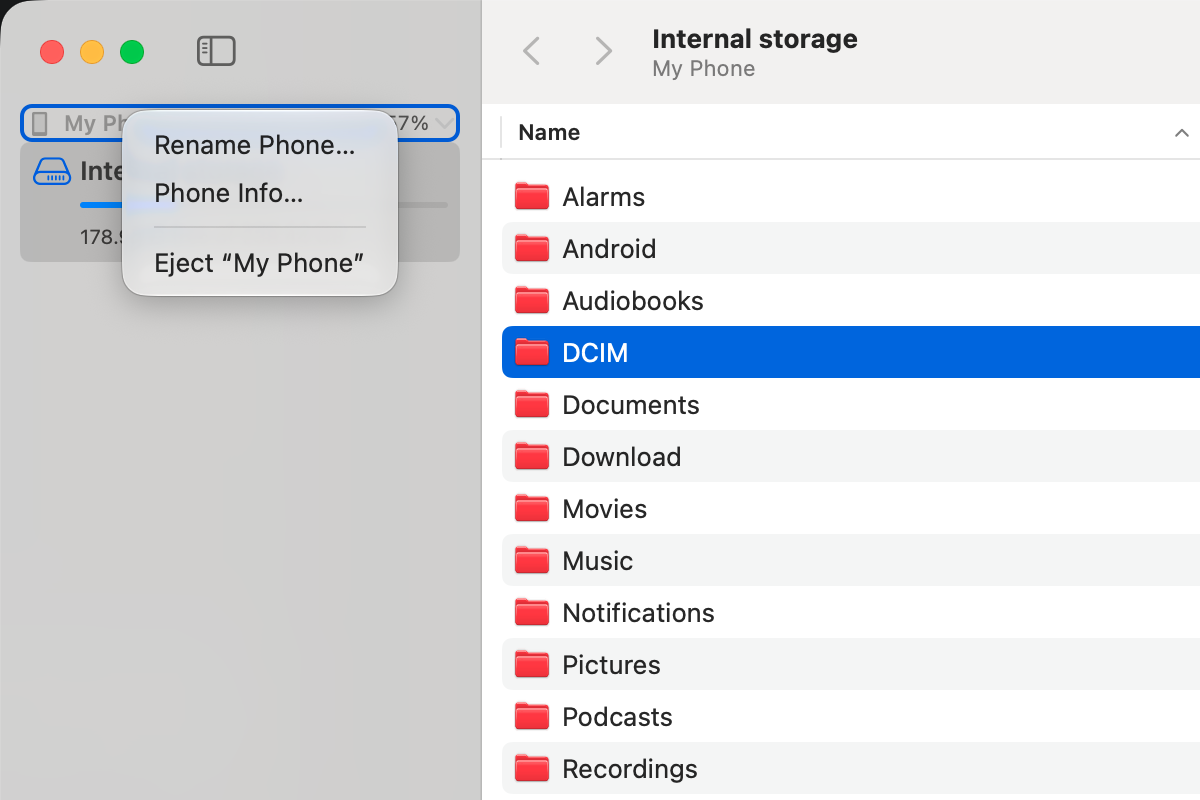
- Nickname: right-click a phone in the sidebar and choose Rename Phone…, for example “Work phone”. Synkbay remembers it for that phone. Choose Use Model Name to go back.
- Phone Info…: right-click a phone to see its model, manufacturer, software version, serial number and storage.
- Several phones PRO: use more than one phone at a time. Without Pro, Synkbay uses the first phone connected. While you have tries left, another phone connecting uses one try and works until you unplug it; after that, other phones show an Upgrade… button.
- A window for each phone PRO: right-click a phone and choose Move to New Window (also in the File menu) to browse it next to your other phones. One phone always stays in the main window. To bring a phone back, close its window, eject it, or choose Move to Main Window (right-click the phone, or the Window menu). If you unplug a phone, its window waits for it, and it opens in the same folder when you plug it back in. Window → Synkbay (⌘0) brings the main window forward.
- Return to the last folder: when a phone connects, Synkbay can open the folder you were last in (Settings → Browsing).
Settings
Choose Synkbay → Settings… (⌘,).
General
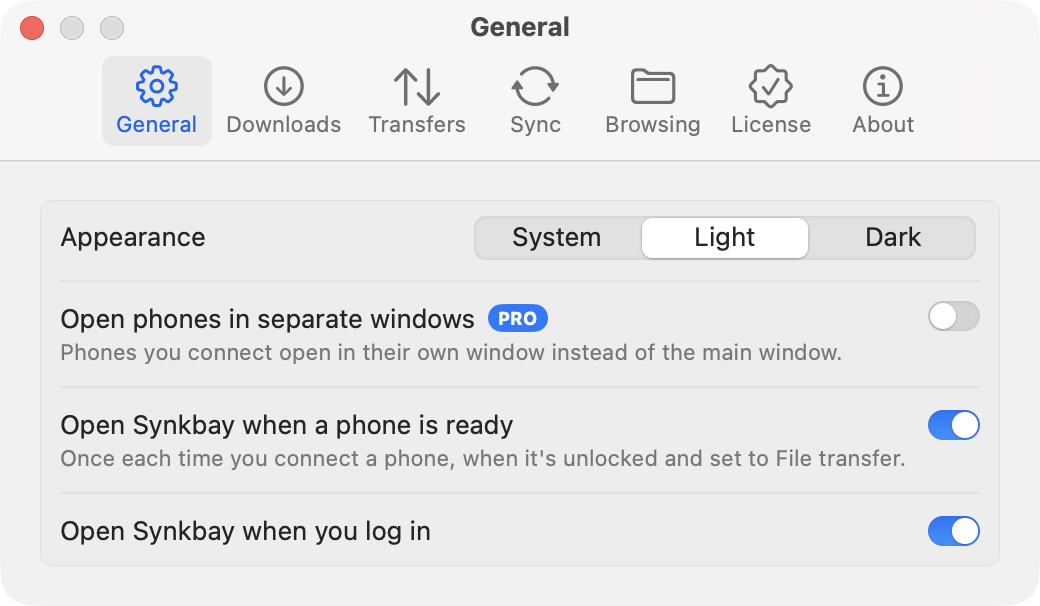
- Appearance: System (the default, which follows Light or Dark mode on your Mac), Light or Dark.
- Open phones in separate windows PRO: phones you connect get their own window, apart from the one in the main window.
- Open Synkbay when a phone is ready (on by default): opens the window once each time you connect a phone, when it's unlocked and set to File transfer.
- Open Synkbay when you log in: Synkbay starts quietly in the menu bar, ready for your phone. If macOS asks, allow Synkbay in System Settings → Login Items.
Downloads
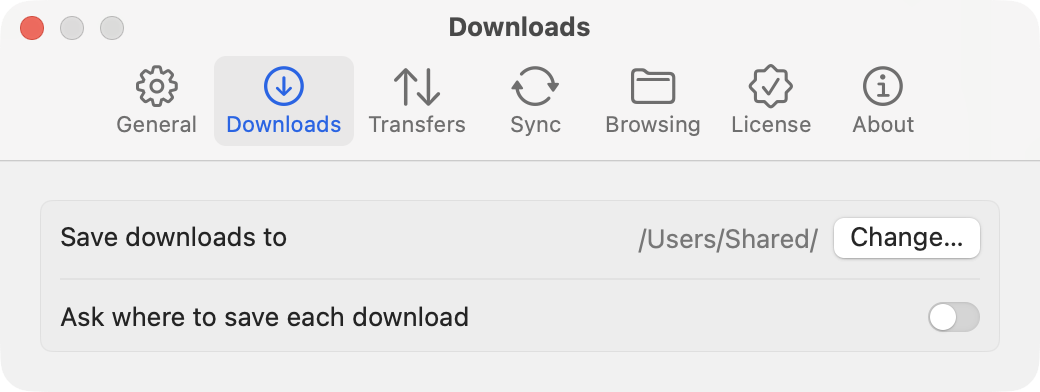
- Save downloads to: where Download puts files. Your Downloads folder unless you change it.
- Ask where to save each download: choose a folder every time instead.
Transfers
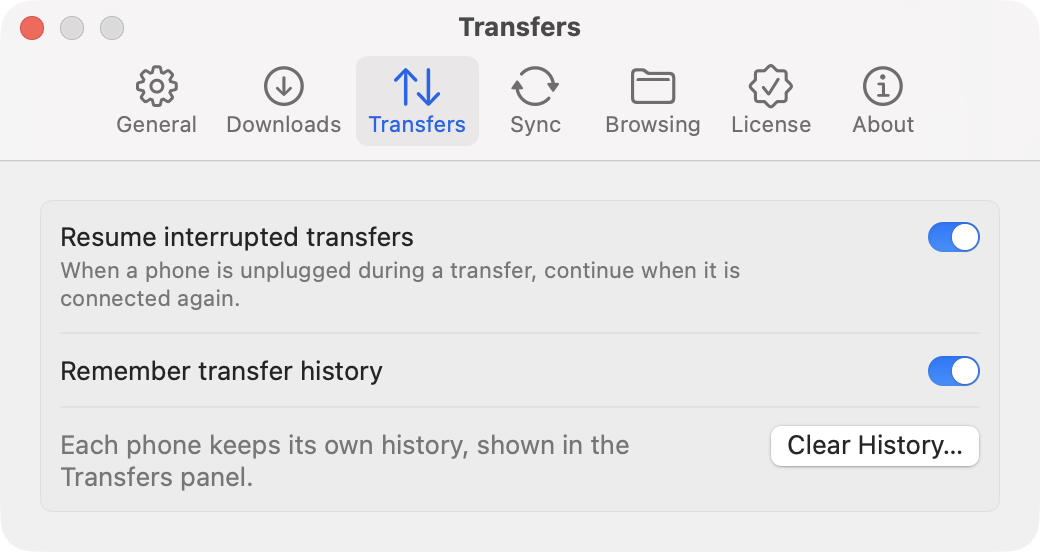
- Resume interrupted transfers PRO: continue transfers cut off by unplugging when the phone is back.
- Remember transfer history, and Clear History… for every phone.
Sync
Sync folders for each phone. See Sync folders. A phone must be connected to add folders.
Browsing
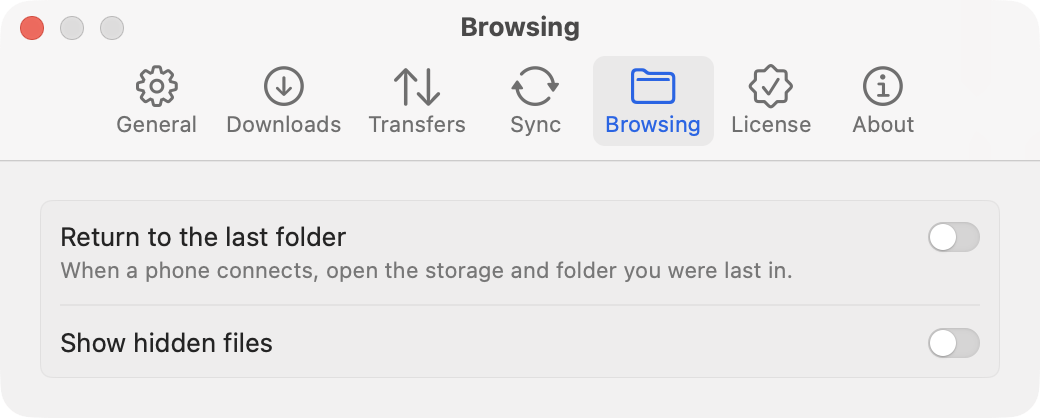
- Return to the last folder.
- Show hidden files: files and folders whose names start with a dot.
License
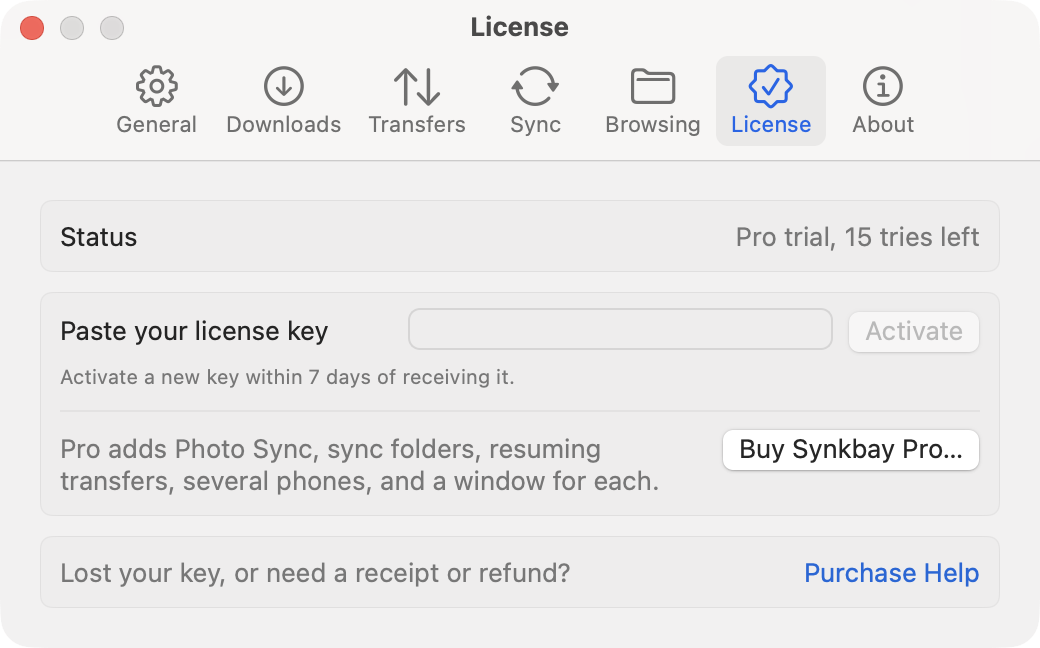
Shows whether you're on the trial, the free version or Pro, and where to enter a license key. See Synkbay Pro and licenses.
About
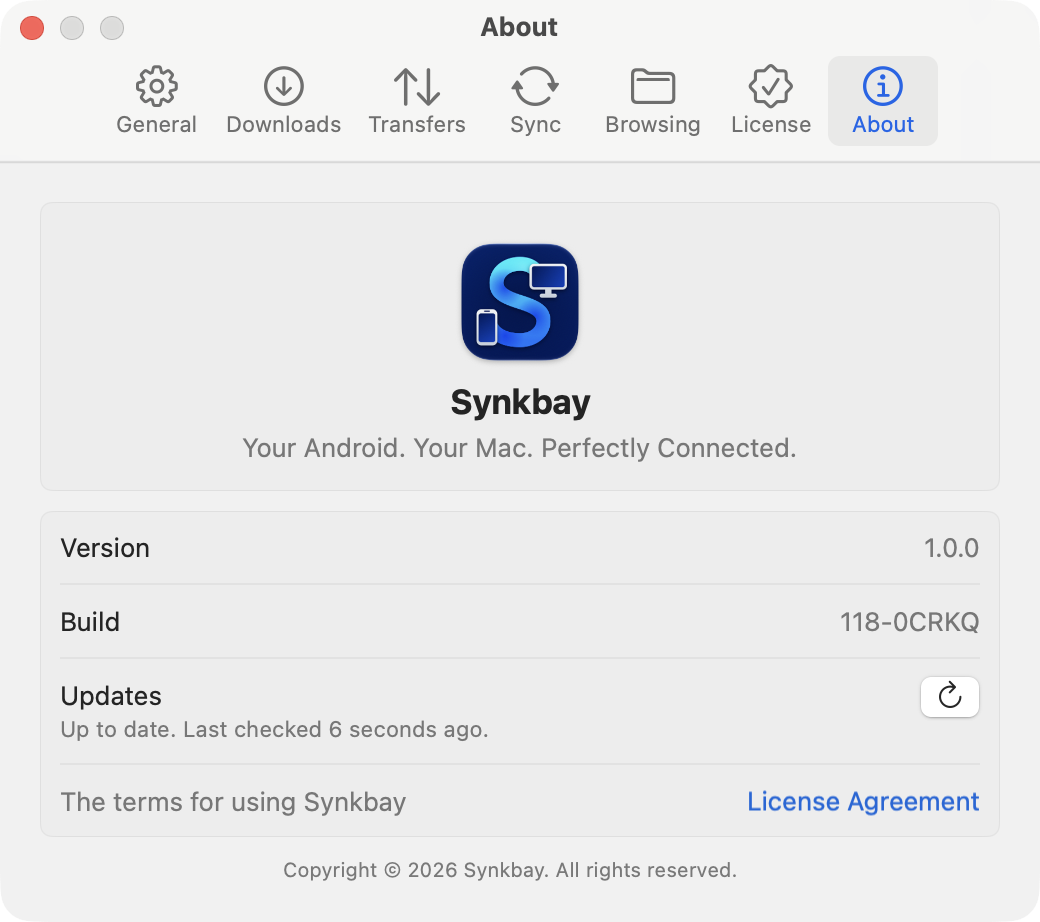
The version and build. Mention them when you contact support, or export diagnostics, which includes them. Updates says whether you have the newest version, with Download… when there's a newer one, or the refresh button (↻) to check now. License Agreement opens the terms you agreed to when you first opened Synkbay.
Synkbay Pro and licenses
Browsing, copying both ways, drag and drop, Quick Look, reconnecting, nicknames and Phone Info are free, with no time limit. Synkbay Pro adds:
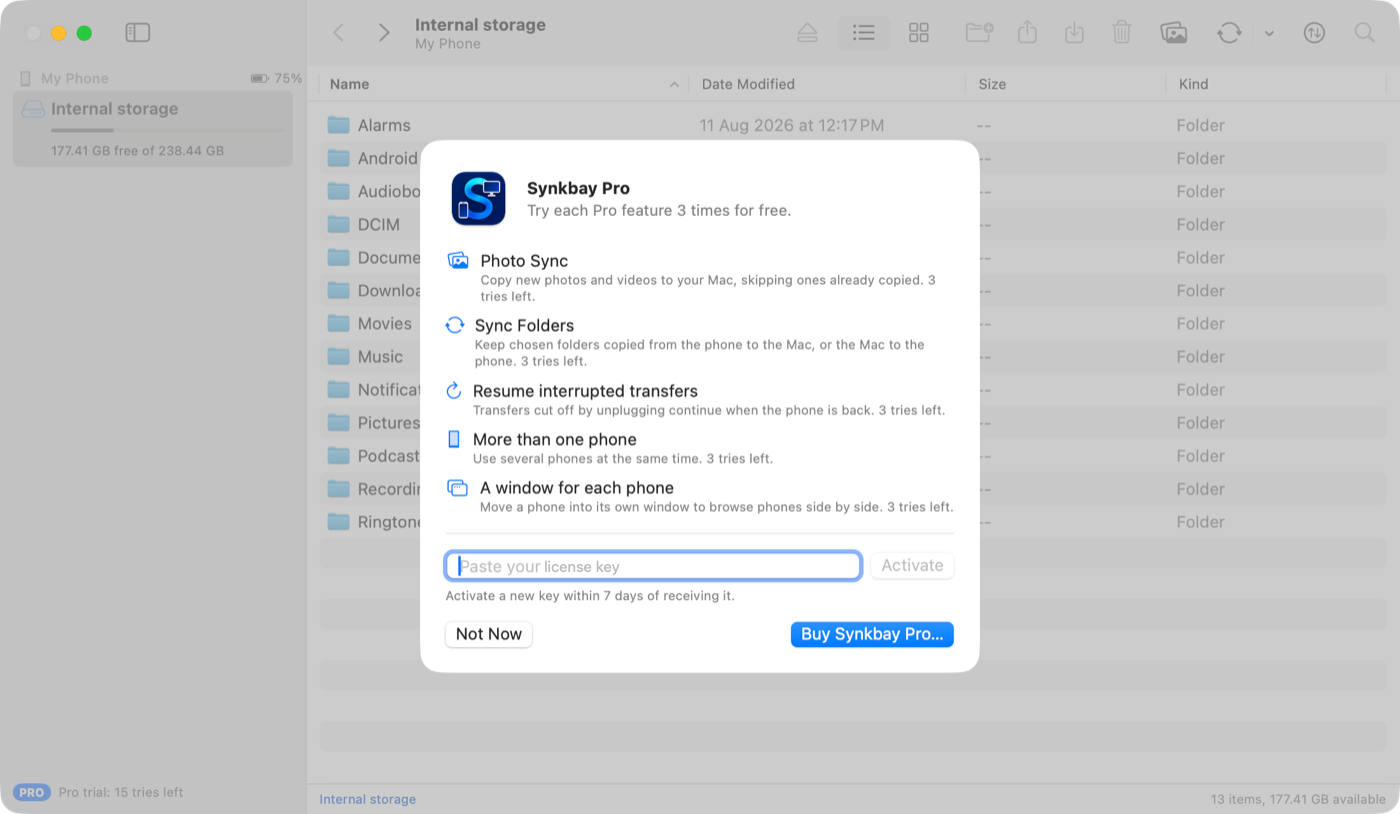
Trial
Without a license, you can try each Pro feature 3 times, with no account or payment details. A try is counted only when the feature actually runs: a Photo Sync or folder sync that starts, transfers that resume after unplugging, another phone connecting, or moving a phone to its own window. The Pro sheet shows the tries left for each feature. When a feature's tries are used up, Synkbay keeps working with the free features.
Buying and activating
- Click Buy Synkbay Pro… in the Pro sheet or in Settings → License. You pay once; the license covers every 1.x version.
- Your license key arrives by email. Activate it within 7 days of receiving it: click the activation link in the email, or paste the key into Settings → License and click Activate.
A key that isn't activated within 7 days expires, and Synkbay says so. Use Purchase Help to get a new one.
Activation ties the license to your Mac and is checked on the Mac, so Pro works offline. Reinstalling Synkbay on the same Mac keeps it, and you can always enter the same key again on that Mac.
Moving to another Mac
Request a new key in Purchase Help with the email address you bought with and your order ID. It's emailed to you; activate it on the new Mac. Each order can get 2 new keys a year. The old key stops working 7 days later, so there's time to set up the new Mac.
Updates and refunded licenses
When Synkbay starts, and once a day while it runs, it downloads a small public file from synkbay.com that lists the newest version and the license keys that were refunded or replaced. It sends nothing about you, your Mac or your phone. A new version shows as Update Available in the Synkbay menu and the menu bar icon's menu, and once in the window. If your own key is on the list, Synkbay says why (the purchase was refunded, the key was replaced by a newer one for another Mac, or the key is no longer valid) and removes Pro after anything running finishes; the free features keep working.
Troubleshooting
The phone doesn't appear
- Unlock the phone, and check that the USB notification says File transfer, not Charging only.
- Try another cable or port. Many cables only charge.
- If the phone asked to allow access to phone data, tap Allow.
“… is using the phone”
Only one app at a time can talk to the phone. Synkbay names the app holding it. Click Quit next to its name, or quit it yourself; Synkbay connects as soon as the phone is free. Image Capture's background helper is released automatically.
“Unlock the phone”
The phone is connected but isn't sharing its files yet. Unlock it, allow access if asked, and check the USB mode is File transfer. Synkbay connects by itself.
“Couldn't connect”
Click Try Again. If it keeps happening, unplug the phone, wait a few seconds and plug it back in. If that doesn't help, send diagnostics.
A transfer failed or stopped
Click the retry button next to it in the Transfers panel. If the phone was unplugged, plug it back in and unlock it; with Pro, transfers continue by themselves.
A license key won't activate
Check the whole key was pasted. If Synkbay says the key has expired, it wasn't activated within 7 days; use Purchase Help for a new key.
Sending diagnostics
If something isn't working, choose Help → Export Diagnostics…, save the zip, and attach it to your email to support. You don't need Terminal.

The package contains a readable report and any Synkbay crash reports from the last 30 days. The report has the Synkbay and macOS versions, your Mac's architecture, the phone's make and model, the connection state, recent errors, the state of transfers, and a list of recent events with their times.
Left out: phone serial numbers, your name and email, your license key, your Mac user name and computer name, and file names. You can open the zip and read the report before sending it.
If Synkbay quits unexpectedly, it offers to export diagnostics the next time you open it.
Keyboard shortcuts
| Shortcut | Action |
|---|---|
| Space or ⌘Y | Quick Look the selected files |
| ⌘U | Upload files to the folder shown |
| ⌘V | Paste files copied in the Finder |
| ⌘E | Eject the phone |
| ⌘[ / ⌘] | Back / Forward |
| ⌘↑ | Enclosing folder |
| ⌘R | Refresh the folder |
| ⌥⌘T | Show or hide the Transfers panel |
| Delete | Delete the selected items (asks first) |
| ⌘, | Settings |
Uninstalling
Double-click Uninstall Synkbay.command in the Synkbay disk image and confirm. It quits Synkbay and removes the app, its login item, settings, saved phone information, transfer history, caches and temporary files. The window closes by itself 10 seconds after it finishes.
Files you downloaded or synced are kept.
Privacy
- Your files travel over the USB cable, straight between the phone and the Mac. Synkbay has no account and no cloud, and works with no internet connection. It checks synkbay.com for updates and refunded licenses, and never sends anything about you, your Mac or your phone.
- Synkbay works with files only: the storage your phone shares in File transfer mode. It has no access to your messages, contacts, calls, notifications, camera or screen, and there's nothing to install on the phone.
- Your license is checked on your Mac.
Synkbay 3. Copyright © 2026 Synkbay. Android is a trademark of Google LLC. Mac and macOS are trademarks of Apple Inc.